After the exclusion of great Start menu in Windows 8 and Windows 8.1, Many windows fan missed the Classic Start Menu. But, with the arrival of Windows 10, we’ve got the Start Menu back in action. The Start Menu has changed a Little bit, but it’s good to see it back in Windows OS.
Sometimes, the Classic Start Menu doesn’t open or start by any means. Even if you press “Start” button on your Keyboard or clicking the “Start” icon on the Desktop, it’ll not open. Many users are facing the same problem and looking to Fix Start Menu Not Working in Windows 10. In this post, I am sharing multiple ways you can fix the start menu not working in Windows 10. All of the mentioned methods are easy and straightforward that will solve your problem of Start Menu not Working in Windows 10.
- Also Read: Fix Taskbar not working Windows 10
How To Fix Start Menu Not Working in Windows 10
Method 1 – Run a System Scan
Running a System File Checker tool will help you in fixing the start menu not working problem in Windows 10. The System File Checker tool in Windows 10 finds the corrupted files in the Windows File System. Most of the times, the damaged files are the culprit behind the Start Menu Not Working problem. Here are the steps you should follow to Run a System Scan and Fix Windows 10 Start Menu not Working issue.
- First of all, open the Command Prompt with Administrative Privileges. To do this, open the Windows Task Manager by pressing “Ctrl + Shift + Esc” on your keyboard.
- Now, in the Task Manager Window, click on the “Run New Task” under “File” options.
- In the Elevated Window, type the “cmd” and click on “Create this Task with Administrative Privileges” checkbox and press Enter.
- Now, the Command Prompt will open with Administrative Privileges. In the Command Prompt, enter the Following Command.
“Sfc /scannow”
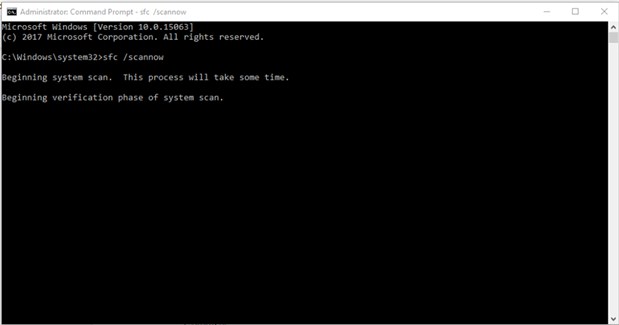
- Now, the System File Checker tool will search for the corrupted file. The scan will take few minutes. Once the scan is complete, Close the Command Prompt and Reboot the Computer.
- Now, you can access your Start Menu by Pressing the Start Button on Keyboard or Clicking Start Icon on the Desktop.
If this doesn’t help you, then proceed to the next method.
Method 2 – Update Windows 10
When you’ve not updated your Windows 10 installation from ages, you’ll face similar problems. Microsoft releases new updates with Bug Fixes every time, and you should install such updates every time. In this case, when you’ve not updated the Windows 10, any Bug in the System may be preventing the Start Menu from working. So, updating the Windows 10 is the best solution for you. To update the Windows 10, follow below mentioned steps.
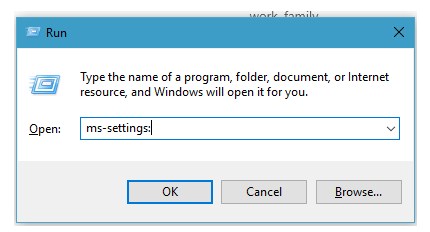
- Open the Run menu by Pressing “Start Button + R key” on your Keyboard. This will open the “Run” Menu. Type “ms-settings:” in the Run menu and press enter. It’ll open the Settings window of Windows 10.
- Now, click on the “Updates and Security” option on the Lower-Right side of the Settings. There, you’ll have to check for updates and install the recommended updates to solve the issue.

- After downloading the update, make sure you reboot your computer to install the updates and then check if the issue has fixed or not.
Method 3 – Disk Image Repair
The Disk Image Repair process helps you to fix the disk image and replace the corrupted files. Fixing the disk image will fix the Start Menu not working in windows 10 problem.
Follow these steps to repair your disk image and solve the problem.
- First of all, open the Command Prompt with Administrative Privileges. To open Command Prompt with Admin Privileges, open the Windows Task Manager by Pressing “Ctrl+Shift+Esc.”
- Click on “File” and click on the Run New Task. Type “cmd” in the text field and click on the checkbox of “Create this task with Administrative Privileges.” It’ll open the Command Prompt with Administrative Privileges.
- In the Command Prompt, type the following command.
Dism /Online /Cleanup-Image /RestoreHealth
- After entering the command, press “Enter.”
- It’ll take some time to complete the entire disk image repair. After that, reboot your computer to see if the Start Menu is working or not.
Method 4 – Reinstall Windows Applications
Missing Windows applications might be the reason behind the Start Menu in Windows not working issue. I’ve faced the similar problem when I removed the Windows applications. The Reinstalling the applications fixed the problem. Follow below-mentioned steps to reinstall Windows Applications.
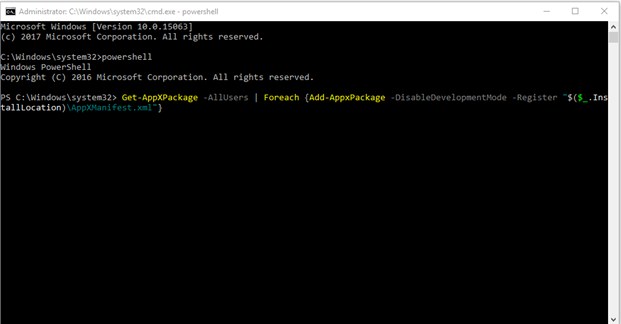
- First of all, open the Command Prompt with Administrator Privileges. You can do it in the same way as mentioned in earlier steps. In the Command Prompt, enter “PowerShell” and press ENTER.
- Now, the Windows PowerShell is opened inside the command prompt. In the PowerShell command line, enter the following command.
Get-AppXPackage -AllUsers | Foreach {Add-AppxPackage -DisableDevelopmentMode -Register “$($_.InstallLocation)\AppXManifest.xml”}
- Now, the PowerShell will download and install all the missing Windows Applications one by one. It’ll take a lot of time to complete the download and installation on the applications.
- If the applications are missing from your computer, then you may see some error messages. Ignore those error messages and let the process finish.
- After completing the process, you can access the start menu in Windows 10.
Verdict
The Windows 10 is one of the best-operating systems in my opinion. It has some bug, but the Microsoft is working on resolving the bugs by releasing the updates.
As I’ve tried all these methods to fix the Start Menu not working issue, I can say that they are working. I hope this post has helped you to solve the issue of Start Menu Not working. If you’ve not tried them yet, then please do try and comment down below if facing any problem.